Are you tired of slow-loading websites on cheap shared hosting? Are you looking for a way to Register a Vultr Account and Create a VPS to host your website? You’ve come to the right place.

In this guide, I will walk you through the exact steps to register, claim your free credit, and set up your server for peak performance. After years of using Vultr for both personal and client projects, I can confidently say the quality, uptime, and pricing are among the best in the industry. Plus, if you follow the steps below, you can snag $300 in free credits to kickstart your journey.
Let’s dive into the step-by-step process!
Why Choose Vultr VPS for Your Website?
Vultr is a global leader in SSD cloud hosting. Many users prefer it because of its high uptime and affordable pricing structures.
- High Performance: Vultr offers High Frequency servers using NVMe technology, which can outperform standard cloud compute instances by up to 40%.
- Global Reach: With dozens of locations worldwide, you can place your data close to your visitors.
- Scalability: You can start with a low-cost plan and upgrade your hardware as your traffic grows without losing data.
How to Register for Vultr and Claim $300 Free Credit
Getting $300 in free credit sounds great, right? To get started, you need to prepare two things:
- A fresh email address: One that has never been registered with Vultr before.
- Payment Method: A valid Visa/MasterCard, PayPal, Alipay, or Bitcoin account.
Step 1: Account Creation
Follow these steps to ensure you receive the bonus:
- Access the official Promo Link to register (credits are only available through specific promotional links).
- Enter your email and a password that meets Vultr’s security requirements.
- Password Requirements: Your password must include at least 10 characters, one uppercase letter, one lowercase letter, and one number.

Step 2: Adding a Payment Method
Vultr requires a valid payment method to verify your identity.
- Credit Cards: Most Visa and MasterCard work perfectly.
- Avoid Virtual Cards: Vultr often rejects virtual or prepaid cards.
- Claiming the $300: To receive the $300 bonus, you must typically deposit a minimum of $100.
- Verification: Ensure your card has at least $100 available, as Vultr will process the charge to link the credit.

➜ See More: Compilation Of The Latest Vultr Coupon Codes This Month!
Setting Up Your Vultr VPS Configuration
Once your account is funded, it’s time to deploy your server.
Step 1: Select Location & Plan – Configure Hardware
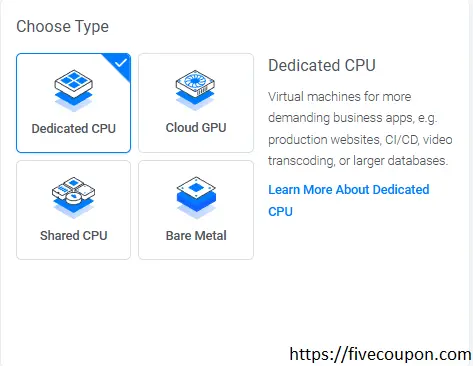
Choose the Right Server Type
- Dedicated CPU: Virtual machines for more demanding business apps, e.g. production websites, CI/CD, video transcoding, or larger databases.
- Cloud GPU: Instances with fractional or full GPUs for AI, machine learning, HPC, visual computing and VDI. Also available as Bare Metal.
- Shared CPU: Virtual machines for apps with bursty performance, e.g. low traffic websites, blogs, CMS, dev/test environments, and small databases.
- Bare Metal: Single tenant bare metal for apps with the most demanding performance or security requirements.
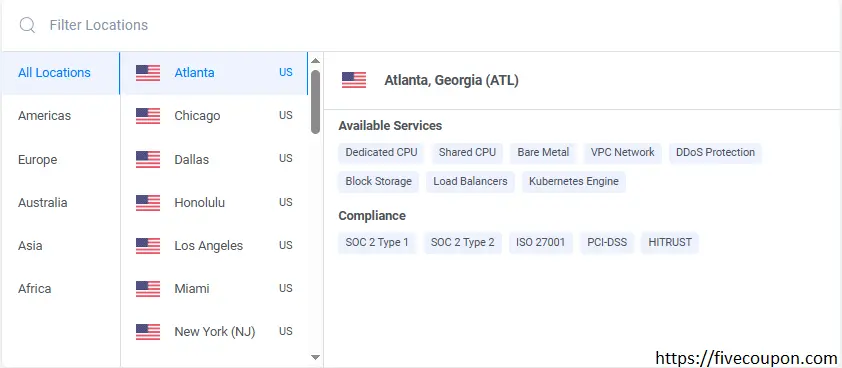
Select Server Location
Choosing a location near your target audience is crucial for speed. For users in Asia, locations like Tokyo, Seoul, or Singapore are ideal. For US-based traffic, Los Angeles or New York are excellent choices.
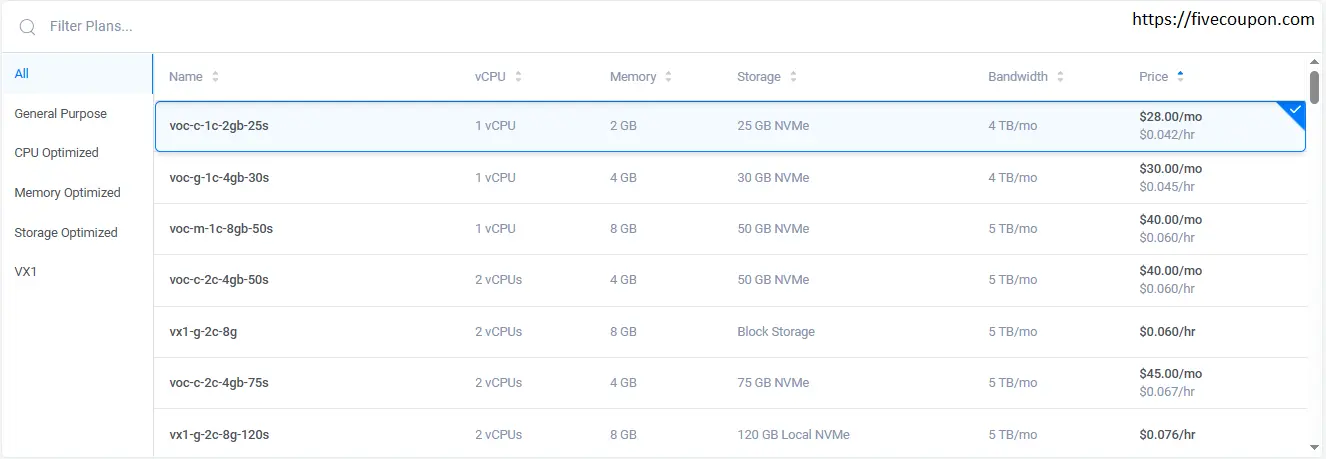
Select The Hardware Configuration (Server Size)
Start Small: I recommend starting with a lower configuration and upgrading later as needed.
Step 2: Configure Software & Deploy Instance
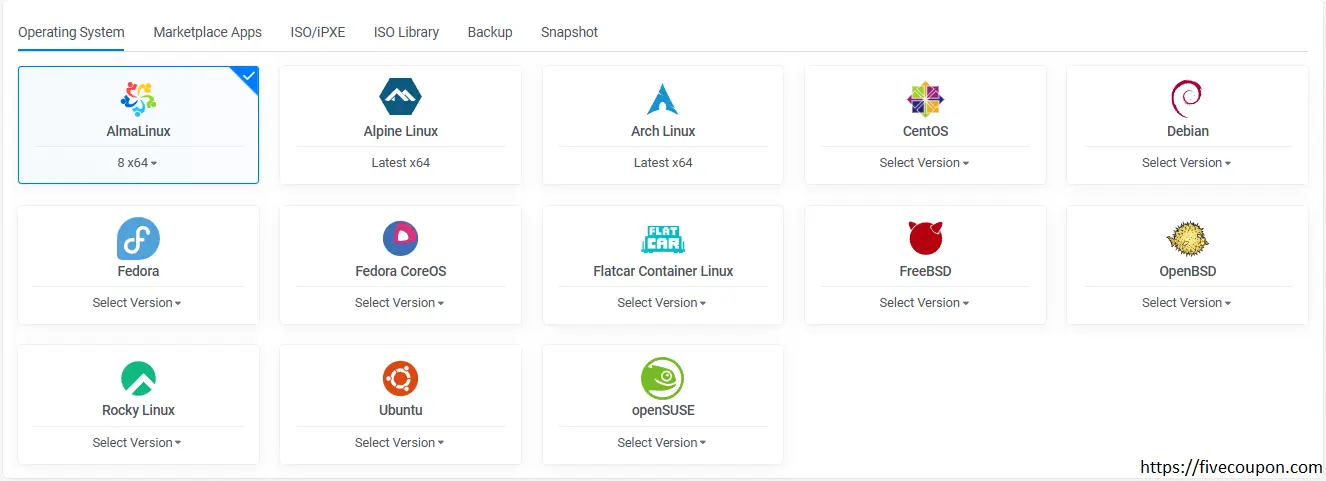
Choose Your Operating System (OS)
- For Web Servers: CentOS 7 or 8 (64-bit) is a popular choice for stability.
- For Windows: You can select a Windows version (licensing fees apply) or upload your own ISO file.
- One-Click Apps: Vultr supports automatic installations for WordPress, cPanel, LEMP, and more.
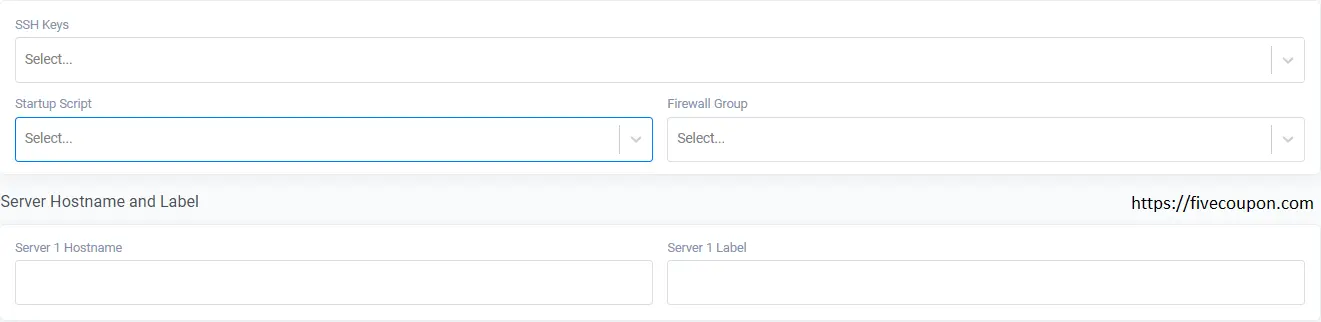
Server Settings
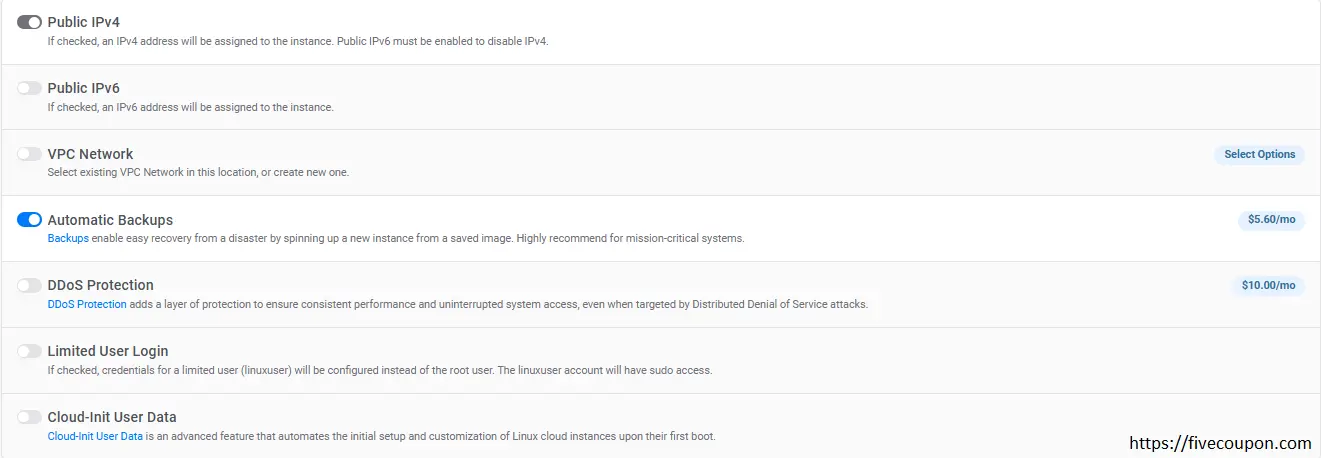
Additional Features
Professional Vultr VPS Setup for Running Websites
After clicking the Deploy Now button, wait approximately 3 minutes. Once the status changes to Running, click on your server’s name to retrieve the following credentials:
- IP Address: This is the digital address of your server.
- Username: This is typically set to root by default.
- Password: Your unique login password provided by Vultr.
The Most Effective Ways to Manage Your VPS
There are two primary paths you can take depending on your technical expertise:
- Use a Control Panel (Easiest): Install free panels like aaPanel or CyberPanel. These provide a visual web interface to manage files, install SSL certificates, and create databases, much like the standard cPanel used in traditional hosting.
- Use a Management Script (Optimal): Utilize scripts such as Lar VPS or WordOps. While this requires using SSH commands, it ensures your website runs extremely light, fast, and secure.
Expert Tip: If you are a beginner, start with aaPanel. It is intuitive, free, and provides comprehensive support for everything you need to get started.
FAQ: Frequently Asked Questions When Using Vultr
Why didn’t I receive the $300 free credit?
- You must be a completely new customer and register through an official promotional link. Additionally, making a minimum required deposit is a mandatory step to activate the credit.
Can I install Windows on Vultr? Absolutely!
- Vultr allows you to upload your own Windows ISO file for manual installation or choose from their pre-configured Windows instances (which include licensing fees).
How can I best secure my VPS?
- For maximum security, always change your default SSH port (which is 22) to a custom number and use an SSH Key instead of a standard password to prevent brute-force attacks.
Conclusion: Is Vultr Worth the Investment?
Replacing traditional hosting with a VPS is a significant milestone in your web management journey. With Vultr VPS, you aren’t just buying a place to park your website; you are investing in stability, speed, and unlimited growth potential. Don’t let your website fall behind due to slow loading speeds. Take advantage of the $300 gift program and start today!
Your Call to Action:
- Register a Vultr account via the promotional link.
- Deploy a server in a nearby location (e.g., Singapore) using the High Frequency plan for best performance.
- Install aaPanel and move your website to the “cloud”.
If you encounter any difficulties during the setup process, feel free to leave a comment below-I am here to help you immediately! I hope this guide gives you the confidence to master Vultr VPS. Good luck!


